Sunday 24 March 2013

Homemade Pretzels

I don't have the sweet tooth many people do however I have a carb tooth (or maybe 2). I cannot get enough of bread, rolls, biscuits, crescent rolls, and pretzels (especially the soft one's). Every time I go to the mall I have a battle between my mouth and my wallet as a pass the auntie ann's pretzel store.. so this Thanksgiving I decided to entire my two older nieces by making homemade pretzels. Very easy and VERY delicious I don't think any were left the next morning. The recipe we used was from the Food Network's Alton Brown whom I have a mild obsession with one because he is from Atlanta and two because he makes cooking fun and three he teaches you all the cool sciencey things behind it! What more could you want? So here is the recipe.

Ingredients
1 1/2 cups warm (110 to 115 degrees F) water
1 tablespoon sugar
2 teaspoons kosher salt
1 package active dry yeast
22 ounces all-purpose flour, approximately 4 1/2 cups
2 ounces unsalted butter, melted
Vegetable oil, for pan
10 cups water
2/3 cup baking soda
1 large egg yolk beaten with 1 tablespoon water
Pretzel salt


Directions
Combine the water, sugar and kosher salt in the bowl of a 
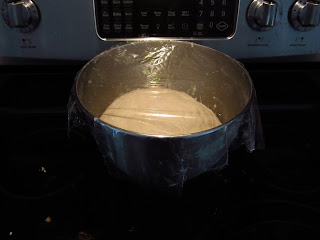
stand mixer and sprinkle the yeast on top. Allow to sit for 5 minutes or until the mixture begins to foam. Add the flour and butter and, using the dough hook attachment, mix on low speed until well combined. Change to medium speed and knead until the dough is smooth and pulls away from the side of the bowl, approximately 4 to 5 minutes. Remove the dough from the bowl, clean the bowl and then oil it well with vegetable oil. Return the dough to the bowl, cover with plastic wrap and sit in a warm place for approximately 50 to 55 minutes or until the dough has doubled in size.


Penny being good and not eating the flying dough. 

In the meantime, turn the dough out onto a slightly oiled work surface and divide into 8 equal pieces. Roll out each piece of dough into a 24-inch rope. Make a U-shape with the rope, holding the ends of the rope, cross them over each other and press onto the bottom of the U in order to form the shape of a pretzel. Place onto the parchment-lined half sheet pan. 


We let the girls each have a section and make their own designs rather than doing the pretzels shapes (Much more fun!)


Preheat the oven to 450 degrees F. Line 2 half-sheet pans with parchment paper and lightly brush with the vegetable oil. Set aside.

Bring the 10 cups of water and the baking soda to a rolling boil in an 8-quart saucepan or roasting pan.

Place the pretzels into the boiling water, 1 by 1, for 30 seconds. Remove them from the water using a large flat spatula. Return to the half sheet pan, brush the top of each pretzel with the beaten egg yolk and water mixture and sprinkle with the pretzel salt. Bake until dark golden brown in color, approximately 12 to 14 minutes. Transfer to a cooling rack for at least 5 minutes before serving.

Eating dough while the pretzels cooked. 


Just to experiment we baked a couple without boil them in baking soda water and then didn't "puff" up as much or have the classic pretzel taste. So I would suggest not skipping this crucial step. 
Some of the girls creations - sprinkle with sea salt or topping of choice as soon
as they come out of the oven, or before the go in to bake.

Thumbs up for easy, fun, and delicious treats! Did I mention they were dairy-free? 

Friday 8 March 2013

Homemade Butter

A couple weeks ago I made butter.  Everyone I've told seems mighty impressed.  But honestly, it's not that hard, anyone can make butter.

All you need is a good mixer, cream, and a bit of time.

Step 1: Put your whisk attachment (if you have one) on the mixer.

Step 2: Add cream to the bowl, start beating the cream on high.  Just like making whipped cream.

Step 3: Realize you've made whipped cream and stop the mixer to taste a bit.

Step 4: Keep mixing, ruining the fluffy whipped cream.  It will fall and become more dense and turn just a bit light yellow.  

Step 5: As the butter comes together, stop and check the consistency and taste until you get what you want.  About 10 minutes for me.Add salt, herbs, or anything else you want for flavored butter. 

Step 6: When you have your better as desired, strain it.  I keep the liquid for biscuits.  Most people call it buttermilk, but it's not the cultured milk you buy in stores.

Step 7: Squish the butter together to form a ball and remove the rest of the liquid.  You can be done now if you want, or rinse under cold water to clean it just a bit more.

Step 8: Form into sticks, or other shapes with a mold.  Or just stick it in a container since it won't last more than a week if your family and friends are like mine.

Step 9:  Enjoy!

Monday 21 January 2013

Beef and Onion Stew

Today I had every intention of making a beef stew.  Then I realized that my potatoes had gone mushy.  Drat.  Time to step back and punt.
I think I could make a meal of just
caramelized onions.  Delish!

We had just picked up a new bag of onions today, so french onion soup was a possibility (and oh so yummy).  But then what to so with the already thawed beef? 

This is when I figures that if french onion soup is good with just beef broth, why not try modifying it a bit to use actually beef chunks?

So, this is what I came up with and currently have simmering in the crockpot waiting for my husband to get home.  Sorry for the bad cell phone pictures.  I didn't think about making this a blog post until about half way through and didn't want to go find the camera.  I really should just leave it out int he kitchen.

Beef and Onion Stew
approx 1lb beef, in 1/2 inch cubes
3 cups beef broth (this can be 1/2 and 1/2 with beer for extra flavor)
2 large onions
1Tbsp thyme
1Tbps mustard
1 tsp garlic powder
salt and pepper to taste
3 carrots (optional, I like the little bit of color)

1) Brown the beef in a skillet and place into the crockpot with the broth.

2) Carmelize the onions and add to the pot (I do this with a little butter, takes about 5-8 min)

3) Add seasonings and carrots.

4) Cook about 4hrs on high.

5) Enjoy!  To really get the french onion thing going on, serve with thick cut bread topped with melted cheese.  Delish!

Cooking away in the crock.  Looks like about enough for 2-3 servings. 
I'm going to make a veggie soup out of the leftovers.
 
Let me know if you try this out and how it works for you!


Monday 24 December 2012

Quick Cookies

Hopefully everyone has their holiday baking well in hand.  But if you just happen to have forgotten you need to bring something to that party tonight... I'm going to share my go-to quick cookie recipes. 
I made both of these two recipes a few weeks ago when I needed to bake cookies in just a couple hours between activities.  Both recipes are five ingredients or less, and cook in just a few minutes at 350 degrees, but are delicious!

Cakemix Cookies
I first learned of these while reading the Hannah Swenson mysteries.  If you like quick, light mysteries and baking I highly recommend the series. I've made these in lemon and chocolate, next up will be red velvet and funfetti. 

1 box of cakemix (any flavor)
1 tub of whipped topping (8oz, I use coolwhip)
1 egg
I already cracked the egg here.

Beat the egg in a bowl.  Add all other ingredients and mix well in a large bowl. 

Roll into small balls (these are super sticky) and then in a bowl of powdered sugar.  Place onto a cookie sheet and bake for about 15 minutes.  Cool and enjoy.  Makes about 4doz, depending on size.


More or Less Peanut Butter Cookies
These come from my friend Samantha's blog The Cluttered Table.  The blog is down now, but perhaps she'll start up again sometime.  They are a family recipe that she was kind enough to share with us all.

1 egg
1cup sugar
1cup peanut butter
chocolate chips (optional)
Hersey's kisses (optional)


Mix egg and sugar in a bowl.  Stir in peanut better until well blended.  Add in chocolate chips if desired.  The dough should be slightly oily, but not overly so, or sticky.

Roll with your hands into walnut size balls and place onto a cookie sheet.  Press down with a fork to create that classic peanut butter cookie look. 

Bake for 15-20 minutes at 350degrees.  Move immediately to wax or parchment paper to cool so that they don't stick to the cookie sheet.  Place the Hershey's kiss on top while still hot.  (I use the chocolate chips but skip the kisses personally.)  Enjoy while warm or cool.


I hope these recipes help when you need a quick but yummy homemade treat.   The great thing is they bake at the same temp for about the same time.  I love it when things work our like that!


Wednesday 5 December 2012

Starting new traditions


We started many new traditions this Thanksgiving! My favorite was our Thankful Tree. It is important to remind our children what Thanksgiving is all about.
Kaleigh (4 1/2 years old) loved sitting with me and talking about the things she was thankful for. As she would tell me I would write it on a leaf to be put on our tree. We then used washable paint on our big window to paint a tree (we didn't have any brown paint but she didn't seem to mind). Each person in the family was given a branch and wrote down the things/people/places they are thankful for.

On a crabby day I would bring Kaleigh and Lilly to the tree and read them the leaves. They would some times add things they were thankful for so they would be added to the tree. Attitudes would generally improve after being reminded of that the things they needed to be thankful for.


Dairy Free Thanksgiving

I have always LOVED cooking which is a good thing considering the allergies in our family. Kaleigh our oldest daughter is allergic to dairy and I am allergic to ALL nuts. Although Kaleigh's reaction to dairy has become less severe it is important for us to keep any form of dairy out of her diet. My allergy to Nuts consists of hives and blisters in my mouth...trust me NOT fun. I have seen conflicting opinions but I believe allergies run in a family. My mother is also allergic to ALL nuts and Catherine (the C in ACE sisters) is also allergic to dairy. My other two girls have not shown an signs of being allergic to dairy or nuts but it is still early days.

This Thanksgiving we had a treat of having Catherine come to visit us! This was her first time seeing Abigail (the newest member of the family) and our new house here in Arkansas.


Because now we had two people in the house that needed dairy-free food I decided to make everything dairy free for Thanksgiving. On the list of food for the feast included: Ham, sweet potato casserole, mashed potatoes, green bean casserole, bread rolls, cranberry sauce, brown gravy, stuffing, and pumpkin pie. Each adult made a part of the meal Curtis made the pumpkin pie with the children, Catherine made the green bean casserole, and I did the rest.


Most dishes can be made dairy free with a simple substitute like milk for a milk alternative (soy milk, almond milk, or coconut milk) and/or butter for a dairy free fat (dairy free butter, oil, or Crisco).
Dairy-free Pumpkin Pie
  • 1/2 Cup Brown Sugar
  • 1/4 Cup White Sugar
  • 1 Teaspoon Ground Cinnamon
  • 1/2 Teaspoon Ground Ginger
  • 1/4 Teaspoon Ground Nutmeg or Allspice
  • 1/4 Teaspoon Ground Cloves
  • 1/2 Teaspoon Salt
  • 2 Large Eggs
  • 1 15-ounce Can Pumpkin Puree
  • 1 Teaspoon Vanilla Extract
  • 1 Cup Soymilk
  • 1 Pie Shell 
Mix the sugars, cinnamon, ginger, nutmeg or allspice, cloves and salt in a small bowl.
In a large bowl, beat the eggs. Add the sugar mixture, pumpkin, and vanilla until smooth (if you are using vanilla Soymilk do not add vanilla . Stir in Soymilk
Pour the filling into the pie crust and bake for about 50 to 60 minutes, or until a knife inserted comes out clean.
Allow the pie to cool for 2 hours.

This tastes as good as regular pumpkin pie!! 
Dairy-free Green Bean Casserole
  • 2 tablespoons extra virgin olive oil
  • 8 tablespoons butter (non dairy)
  • 10  mushrooms sliced
  • 3 tablespoons flour 
  • pepper to taste
  • salt to taste
  • 1 1/2 cups of soymilk (could use chicken broth)
  • 16 ounces green beans(we used fresh but could be canned or frozen)
  • 1 container of French-fried onions
If using fresh green beans:
Snap ends of green beans (I never cut my green beans with a knife). Cook in boiling water for 5-10 minutes. 
In a sauce pan add oil and "butter" and heat until melted. Saute mushrooms in oil and "butter" mixture for about 5 minutes or until mushrooms darken and shrink.
Remove from heat. Add three tablespoons of flour and mix together. 
Slowly add the Soymilk, salt, and pepper. If the mixture is too thin add additional flour for a thicker.
Pour over green beans. Add half the can of french-fried onions and mix.
Bake for 30 minutes at 350 degrees.
Sprinkle french fried onions on top and bake an additional 5-10 minutes

 Here is our feast!! Yum Yum

Saturday 10 November 2012

An ACE tradition

 When I joined the family I discovered a much loved tradition of the family...FRESH POPCORN!
This is my oldest daughter Kaleigh taking part in the family tradition.

Step one: add enough corn oil to cover the bottom of the pan
 Step two: add three popcorn kernels and wait for them to pop
Step three: (have to do this fast so no picture) add enough kernals to cover the bottom of the pot.
Step four: shake the pot as you watch the kernels pop! Take off of the heat when kernels slow down popping.
Step five: add salt to taste...YUM YUM

It is Kaleigh approved!